Showing posts with label FInal Project. Show all posts

Tuesday, November 28, 2017

Final Project Post!

   My vanity refinishing project is complete!  I think it looks even better than I had hoped it would six weeks ago when I decided to take on furniture refinishing.  I went from having this in my bedroom:

to this:


Huge difference!  It looks so much neater and more sophisticated.  Not to mention, I did it (with a little help from my husband)!  And I learned a lot about learning from free tutorials on the internet, furniture refinishing, power tools, and frame building along the way.

    This project helped me feel like a more competent homeowner.  I am more capable than I thought I was when it comes to remodeling small projects.  Overall, I really liked working with gel stain but YouTube was my friend when I had to troubleshoot.  The first coat must be completely dry before applying a second.  Otherwise, you will end up removing the first coat of stain.  I also learned just how important it is to pay attention to weather conditions when waiting for gel stain to dry and to be patient.  I have painted walls with latex paint and it is somewhat similar, but I felt this stain was a bit more particular to work with.   If I were to try this project again, I might invest in a chemical deglosser like some of the tutorials.  I am not sure if this would have an effect on how well the first coat adheres to the wood or not, but I think it might be worth trying.  I would also buy some paint thinner to make clean up easier.

    Learning how to use the basics on a drill, power sander and miter saw made this project so much easier than using hand tools.  They really are worth learning how to use.  They save time, can produce better results, and boost confidence!  While I hated sanding, the sander was easier than using sandpaper and sanding block alone.  I loved using the drill and saw and am glad I am no longer nervous to use our power tools.  Knowing how to use them opens up so many more projects to me.  (Thanks handy husband for showing me the ropes!)

     Surprisingly I am also glad that framing the mirror gave me some difficulty, even more than figuring out the gel stain.  Much like my students will have to do, it forced me to think outside the box and problem-solve.  I did some research and tried something new.  Better yet, it worked!  While figuring out how to make my cuts with the saw more precise was frustrating,  it was also empowering.  I developed new skills and added a whole variety of items to the list of things I can now do!  Like many, I dislike when I fail, but learning to find a way around the bumps in the road is important.  It makes failure less scary and helps build a growth mindset.  I built the frame and added hanging brackets on the back, then measured and used a level to find out where I needed to place my nails over the mirror.


The only thing I plan to do later is to dab some stain over the wood filler in the corners and to stain the inner edge of the frame.  After hanging it over the mirror, I realized the mirror reflected the unfinished wood which looked strange.   This was an awesome learning experience and I am so pleased with the end results of my project!

Monday, November 27, 2017

Final Project Post 6

     The project progress took a hiatus for Thanksgiving break.  There was just too much happening.  I had kids' parties to attend, a 19 lb turkey to roast, and then had to pack up our family of 6 to head to Schaumburg, Illinois for my eldest daughter's dance competition.  Talk about a whirlwind weekend.
He loves helping! 


   I also had to take a break because I hit a couple snags in my plan:

    First, I tried to order a new vanity counter top at Lowe's, but it was ridiculously expensive (roughly $50-$80 / sq. ft/) and I waited too long.  It was going to take 10-15 days to come in.  There was no way my project would be finished by the Thursday following Thanksgiving.

    Second, I didn't cut the baseboard I was using to create a mirror frame exact enough.  I measured twice, but was somehow off by about a 1/2 cm on two sides.  My plan to glue the pieces around the mirror was not going to work.  I didn't realize this until after I glued the mirror up and one side of the planned frame.
I used Gorilla Glue to attach the mirror.

and tried to use it on the frame...
 I quickly removed the piece of wood from the wall.  Then, I panicked a bit, and found a way to "make it work"(thanks for the words Tim Gunn).

     The countertop solution was a happy accident.  My husband happened to get a business card from the owner of a shop that builds countertops.  This owner also just happened to have a piece of solid surface material that was damaged during shipment, so he gave me a great deal on building me a top!  Luck?  Yep, and I will take it!

      The framing solution took a bit more effort on my part.  I didn't want to spend more money on more baseboards.  And I didn't have time to stain and topcoat new boards either.  I realized after researching how other people framed mirrors that I could trim the boards a bit to make the corners match and hang the new frame like a picture OVER the mirror.  I just needed to create an actual frame.  This is a little tricky even when the boards meet up perfectly.  I recut the boards trimming them a half inch shorter than what I was originally going for.

        Then, I used wood glue and staples to create the frame and then let it set overnight.  I still needed to use some paintable wood filler to fill the cracks in two corners.  I will need to dab some stain over that later, but right now I am just concerned with getting the frame made and hung on the wall.

    The rest of the vanity has been reassembled with new knobs and new top.  The top was attached with the Gorilla Glue as well.  It looks great so far, but I want to save the photos of the final product for my final post tomorrow!

Tuesday, November 14, 2017

FInal Project Post 5 - PowerPoint!

Monday, November 6, 2017

Final Project post 4

    Sanding done - check!
    Staining begun - check!
    Mirror removed - check!
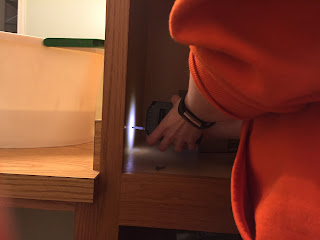
    Electrical outlet moved - check!  (Thanks handy husband!)
    New mirror and framing purchased - check!

    My project is coming along.  Progress is happening a bit slower than anticipated, but I have 4 kids....so that is to be expected.  Nonetheless, the worst part is over.  I hate sanding! It is so messy!  Dust was EVERYWHERE!  The OCD part of me almost lost her sanity.  But, then she finished faster by using an electric sander and quickly grabbed a vacuum.  Whew!


    The mirror came loose much easier than expected, but was too heavy to lift so my husband did that before moving the outlet.  I like the new spot it resides in.  Must less obtrusive.  I can't wait to hang the mirror on the wall.  But I need to figure out exactly how I want to do that first.
Notice how he deftly rotated said outlet!?  
Also, notice that I did indeed properly prep walls and protect carpet with tape.


    The first coat of stain has been applied.  It certainly isn't pretty yet (very streaky looking), but I am going to trust the YouTube video and web tutorials and believe later coats of stain improve the look.  I created this list of helpful tips on canva.com.

Thursday, November 2, 2017

Final project update- week 3

   Lots of slow progress as been happening this past week!  I removed all cabinet doors, drawer fronts, and drawers.  I even used an electric drill to remove the vanity top and side piece!  I was a little nervous about power tools, but my screwdriver and brute strength weren't cutting it.  After I got the hang of using the right amount of pressure on the trigger, the screws came out easily.  I only stripped one screw, but my husband taught me how to use a rubber band to help the drill catch and remove it.  The rubber band fills the hole and gives the drill something to catch.


   My little guys were desperate to be included in the process, so I had them help me scrub everything down with a solution of Dawn dish soap, washing soda, and warm water.   We used a scrub brush and rags to get everything super clean.  Some tutorials used a chemical stripper to remove grime, but I feel like that is overkill.  I wasn't looking forward to those fumes, and besides, I am sanding to rough up the finish anyway.  The bedroom carpet was a little wet, but at least it wasn't soaked by a flammable substance, right?  Sorry about the photos...this is the best you get when the photographer is 4!


      Then, I proceeded to start on the sanding.  I will be honest, this is my least favorite part thus far.  The sand paper leaves my hands dry and raw and the dust goes everywhere.  I should have invested in a mask.  I am glad I moved the doors and drawer fronts to the basement for sanding.  Sanding the vanity base alone is going to make my bedroom a mess.  I intend to tackle that tomorrow with a power sander!  Maybe I won't mind sanding so much then, but I think the paper and sanding block worked best to get all the nooks and crannies in the doors.   I am attempting to include a timelapsed video of me sanding one of the drawer fronts to give you an idea of how time consuming sanding by hand truly is.  And to be clear, I am only scuffing the surfaces with 220 grade sand paper, not removing the finish entirely.


Wednesday, October 25, 2017

Project progress-week 2 update

     This week's progress consisted of prep work and purchasing materials.  I am a little afraid of the demolition part (removing the countertop and mirror), as my daughter's use this vanity daily to get ready for school.  In order to give myself ample time without upsetting our daily schedule, I plan on completing those parts of this project this coming weekend and will provide photos then.

This week I checked out the following sites and videos to be sure I would be prepared.

https://www.maisondepax.com/2016/08/diy-gel-stain-cabinets-no-sanding-stripping.html

http://www.diynetwork.com/made-and-remade/learn-it/use-gel-stain-to-spruce-up-cabinets-lamp-bases-and-more

https://youtu.be/plePW69gKcw

I also purchased the following supplies:

I found them on Amazon.com, but it is possible they are sold elsewhere at better prices.  With 4 kids and my own classes to juggle, I don't usually have time to shop around.  I fully take advantage of a Prime membership that gets me free shipping on many items.


The sites also recommend having sanding blocks and/or an electric sander, drop cloths, painters' tape, painters' pyramids, foam brushes/old socks, TSP (a deglosser), mineral spirits, and general tools like screwdrivers.  I am not using TSP, but am going to wipe everything down with diluted denatured alcohol instead.  I am also planning on throwing the old socks or paintbrushes I use away, so I am not investing in a large can of mineral spirits, only a small one for minor clean up.  Everything else we own somewhere in the garage or craft box.

   I have taken off cabinet doors and drawer fronts.  They are currently in my basement waiting for me to sand them down. That was an easy job with a screwdriver.  I will admit I needed by husband's muscles to remove a few of the knobs, as whoever originally put them on must have been related to Superman.  Tonight begins the sanding!

Expect more photos later this week!

Saturday, October 21, 2017

Final Project - Learn Something New

   After all this talk and research about technology, I need to put it to good use and use technology to teach myself a new skill.  After much thought and consideration, I realized if I was devoting all my spare time to a project, I wanted to have something lasting to show for my effort.  I settled on learning to refinish builder's grade oak cabinets, a vanity, in fact.  I have lived in our current home for about 5 years, and I have wanted to replace the strange built-in vanity since we moved in.  Our budget, however, has never been able to stretch far enough to replace it.

    After a bit of Pinterest research, I realized I could refinish it to make it look more updated.  I just need to learn to use some tools and new products! The internet is full of YouTube tutorials and blogs on how others have done similar projects.  I like this blog tutorial best so far and am using it as a guide.  While my husband is fairly handy and owns quite a few tools, I have never been one to tackle power tools and stain.  Painting a room I can do.  Using saws, drills, and power sanders?  Well, I am going to learn.  In addition to gel staining my vanity, I intend to replace the mirror and frame a new one, and I plan on replacing the laminate countertop with something nicer.  My husband has kindly offered to tackle the one thing I do not feel prepared to do... move an electric outlet.  It is currently sitting in the middle of the mirror.  Weird, right?  Let me give you a better idea of the project.
See the outlet?


(Sorry, for the strange angle, but a wall is in my way and is prohibiting me getting the entire vanity in the frame from the front.)   So other than that pesky outlet, this project is all mine!

Bring on the parts I am most looking forward to, demolition and shopping for supplies!


Final Project Post!

   My vanity refinishing project is complete!  I think it looks even better than I had hoped it would six weeks ago when I decided to take o...